Article
How to integrate Lightspeed (L-Series)
with Voucher Connect
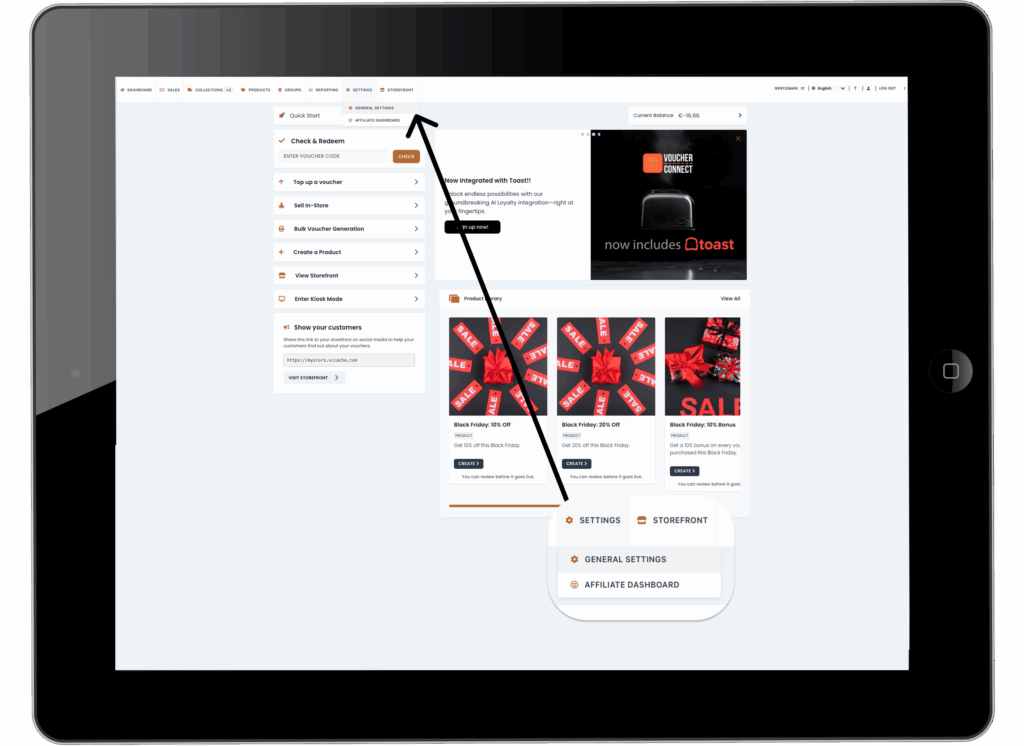
Step 1
Once logged in, navigate to the settings section. Within settings, locate and select “General Settings.

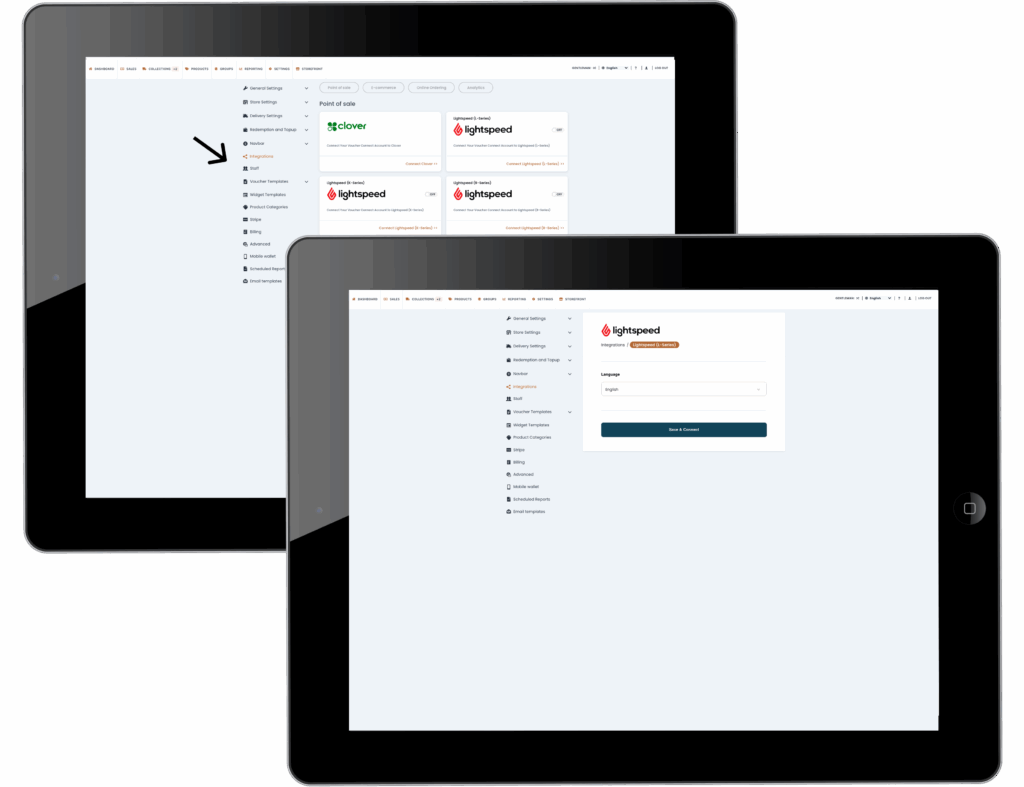
Step 2
To set up the integration with Lightspeed, start by accessing the integrations menu located in the sidebar of your dashboard. Once there, scroll down until you locate the Lightspeed integration option. Then, toggle the dropdown menu to enable the integration.
Choose your desired language and then proceed by clicking on the “Connect” button to finalize the integration process.
This will ensure seamless communication between Voucher Connect and Lightspeed, enhancing the efficiency of your voucher management system.

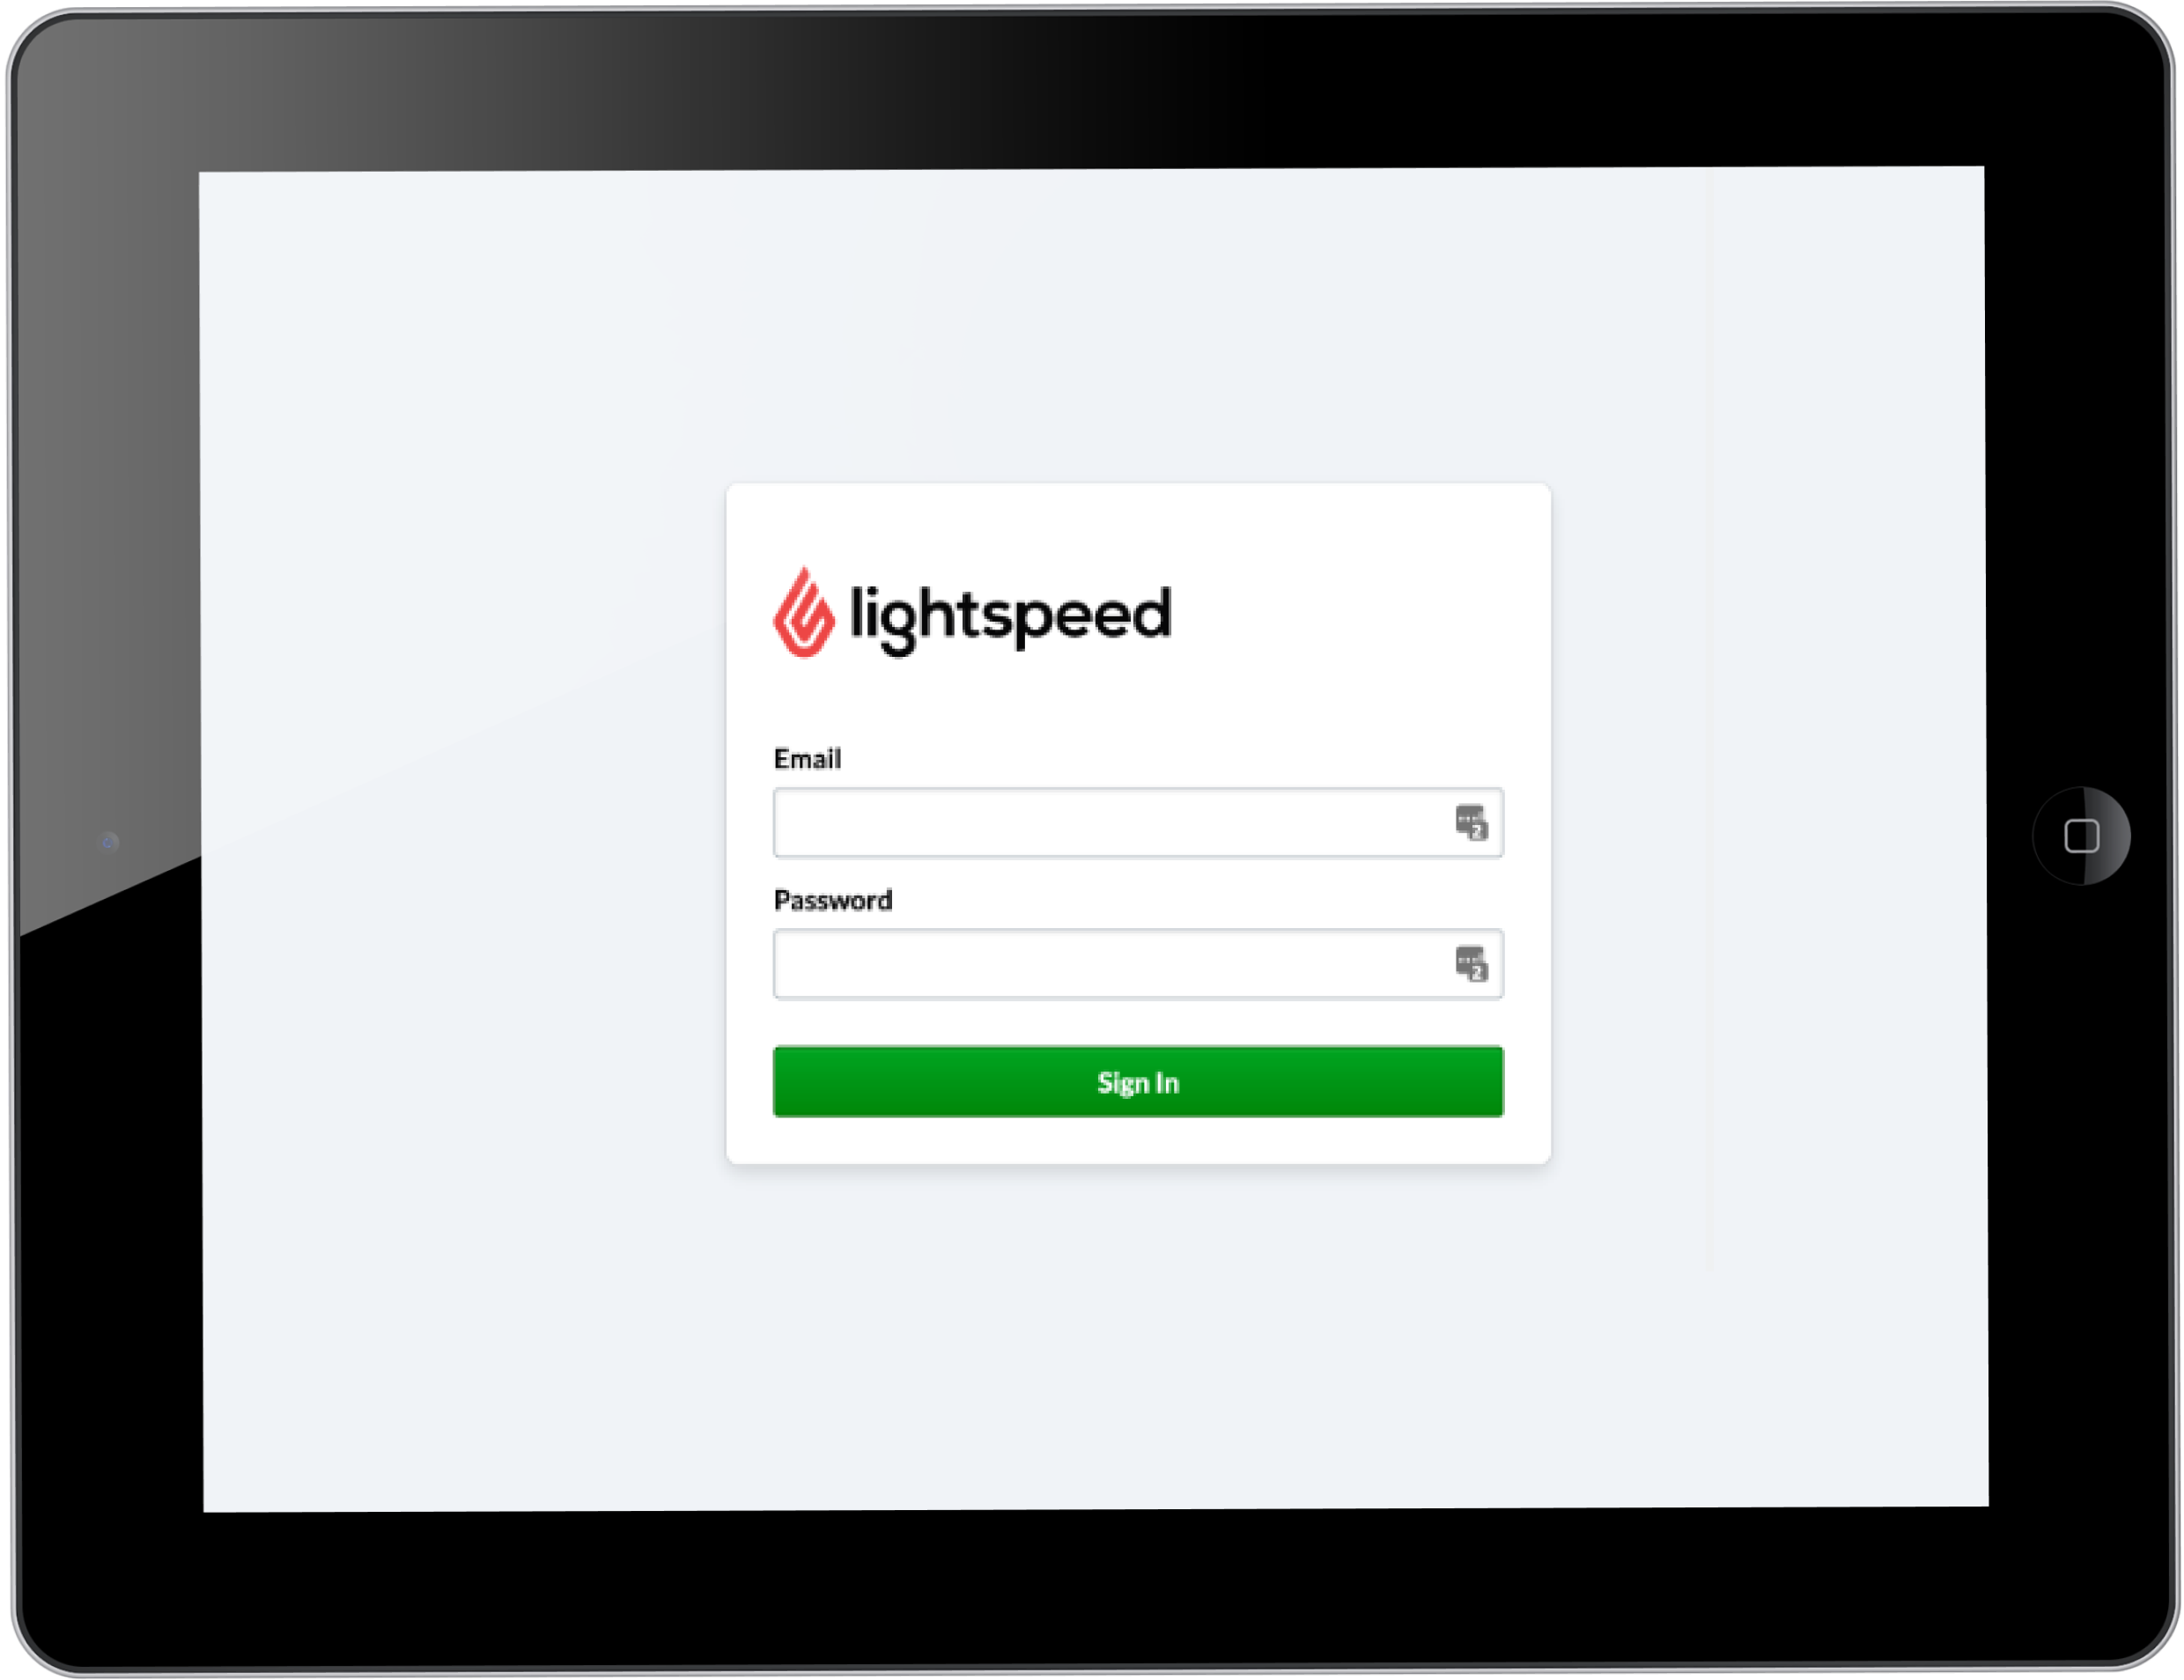
Step 3
You’ll be prompted to input your username and password. It’s important to note that if you have multiple Lightspeed locations, you should ensure that you specify the particular location you want to link correctly.
This specificity helps in accurately connecting the respective locations and streamlining the integration process for smoother operations between Voucher Connect and Lightspeed.

One final note
Once you have connected your Voucher Connect and Lightspeed L-Series accounts we must wait for Lightspeed to activate the Voucher Connect button in your POS payment screen .This will take 72 hours approx. Please contact us directly if you do not see the new Voucher Connect button after this time.
